If you know Air Gear already, you probably also know that this series was mostly written and drawn for a male audience and it's impossible to ignore the amount of fanservice. And the Masked Croissant is a perfect example of this fanservice. It's a great excuse for female cosplayers to pick something sexy for a change though.
... Which isn't why I chose to cosplay her, by the way.
Ringo is probably my favourite female character from Air Gear and I love how she's all confused about being in love with Ikki. It makes her both really vulnerable and really strong at the same time. All of her costumes are really awesome (imo) and it would be great if I would get the opportunity to make them all, once. But till now, I'm gonna keep it at this one. Because, out of all, this one is at least the one with the most storyline (and skin, olololol). That, and if I'm not mistaking, I'd be the first dutch cosplayer to cosplay her.
(don't get me wrong, being the first isn't my ultimate goal, but I'd never cosplay a Naruto character (for example), because I truly think that's done WAY too many times by now) (plus, it's fun to be unique. B) )
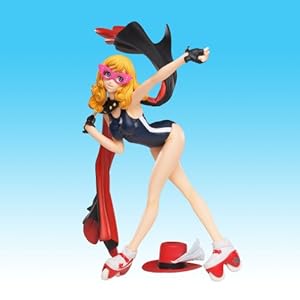 I prefer manga over anime and I don't even know if she appears in the anime series in this form, so I picked the figurine as an example for my cosplay. I already finished her school bathsuit yesterday, but because I don't have progress pics of that one and I can't make a proper pic of the end result because my mom broke the big mirror a few days ago, I'm gonna skip that one.
I DID make pictures of making her mask, though! Not as many as I should, because it was halfway the process that I decided to start a blog, but it'll do for a first entry.
Her mask was my first attempt on a cosplay prop too, which meant NOT working with fabric for once, and it was a nice change of materials for once.
I started off with drawing out the mask with all its details on a thin piece of cardboard (originally an icecream box, ripped apart). Which looked like this, in the end:

(this is my I'm-sorry-but-I'm-having-a-working-at-home-day-outfit, by the way. Plain shirt, my fuzzy hair tied back and being extra fuzzy, and a total lack of makeup. Also yay for horrible lighting!)
Because I thought just a thin piece of cardboard isn't mask-worthy and because it's a little thicker than just this on the figure too, I decided to make a clay mold of it too, using this as the base. So I went shopping! And came home with the following:

(I already owned the glue gun, btw)
I got myself: Darwi extra light clay (approx €6,70), two small tubes of acrylpaint and two brushes because I'm out of brushes. And this is where the lack of pictures comes in.
After getting all this, I took a small piece (about 1/6th or so) of the clay and rolled it out until it was half a centimeter thick. I placed the cardboard mold on it and cut the clay arount the edges of the mold. As you can see, there's a line ON the mask too. So I cut the mold in two, one half staying in one piece and the other half wreckable. So I cut out the inner form and traced that one carefully on the clay, about a millimeter deep, with a toothpick.
The next step was a tricky one- a mask isn't flat, so I wanted it to dry up/harden out in a small bow. I had cut an extra mold from the piece of cardboard that was only the basic form, not the details on it. I made it stand up a bit round by sticking the two outer points together with sticky tape, carefully placed the clay mold on top of that, lay it on a safe place in my bedroom (which was a challenge, because my room is a royal mess) and then I waited.
The following day, it looked like this:

I was proud of self. C: (on the lower half of the pic you see my wrecked example mold)
The awesome thing about this form of clay, is that it isn't really "clay" as most of us know it. The stuff really is insanely light and when it's still soft and kneadable it isn't the nicest to work with. Where actual clay is a little sticky and two pieces of the same clay don't have a hard time being knead together again, this stuff barely sticks to your fingers, it's slightly crumbly and when you try to knead two pieces together again, you'll find out that it doesn't attach to itself as easy as real clay does.
There's a lot you get back for it though. Once the stuff has hardened out, it's really easy to work with. It's still as light as first and it doesn't harden out as hard as normal clay- on the contrary, it even feels a little gummy. You can still push it in a little with your fingers and it can still bend a little. The surface feels almost silky soft and smoothening it out with sandpaper goes really easy as well. Even though I'm still a total props n00b, I already concider this stuff brilliant.
... Too bad that, even though it's slightly bendable, it can still break. Which is, ofcourse, what I did. >_>
This is what it looked like after glue-ing it together again:

Thank god the stuff doesn't really crumble when it breaks so you could easily put it together again, without missing bits. The crack is still visible though, and it almost looks like it has a scar now. ;^;
I smoothened the crack out again by taking a bit of the clay and making it stickier with a little water.
With a piece of sandpaper I smoothened the whole thing out, including the bobble the mask somehow got left to the lower crack after glue-ing it together again. :/
For extra security and for making it easier to attach a string on it, I glued the mask on the piece of cardboard I also used to let it dry up in a curve. Which looked like this at the back:

I had to cut off a lot of extra cardboard, because somehow the clay had shrunk a little in the drying process. That, and I don't want the cardboar to fit around the edges perfectly, because you'd see it from the sides then. I made holes in the cardboard and when the clay was still soft, I made small, oval-like denches in the clay, so I can still pull a string through it without having to see it on the front.
I'm not sure how well gluegun-glue attaches on this form of clay yet, though! When some pieces of the just-glued-on cardboard were still a little warm from the glue, I found one corner a little easy to pull off. But I think I'll find out the details along the way.
And then- PAINT! \o/
Painting went better than I had expected, though I still needed a layer or three until the pink was nice and even on the whole mask. The paint dried pretty fast though, so when I had finished one layer, I could already start the next on the point I had painted the first.
The end result till now looks like the following:

Sadly, you can still see the scar/crack on the left, but it'll have to do for now. I painted the yellow spots on by using the already abused half of the first cardboard mask and taking the small holes out to be able to trace them. When I had done so, I perfectionized the spots without the mold.
Now all that's left is finding a way for it to stay on my face! This seems to be a tough one, because it should lean on my nose, but not against my forehead- there has to be a centimeter-or-so space in between. Do you have any idea how to solve this?
-SO YEAH. So far for now~!
Geen opmerkingen:
Een reactie posten